How To Place Your First Gelato Order
by Michael Essek · Updated: January 30, 2025Are you thinking of trying out Gelato as a potential Print on Demand Fulfilment Partner – but not sure where to start?
If so – I got you. In this article I have a step by step guide to how you can place your first order with Gelato, without having to integrate with any marketplace or storefront.
In other words, you can test the quality of Gelato’s service and their products, without the effort of setting up a full integration.
I’ll show you:
- How to setup your free Gelato account
- How to place your first Gelato order
- What to look for when you receive your first order
So let’s dive in!
Legal note: This article contains affiliate links to products and services I use and recommend.
1. Get A Free Gelato Account
The first thing you need to do is to setup your free Gelato account.
Setting up your Gelato account is very straightforward – let’s get into it:
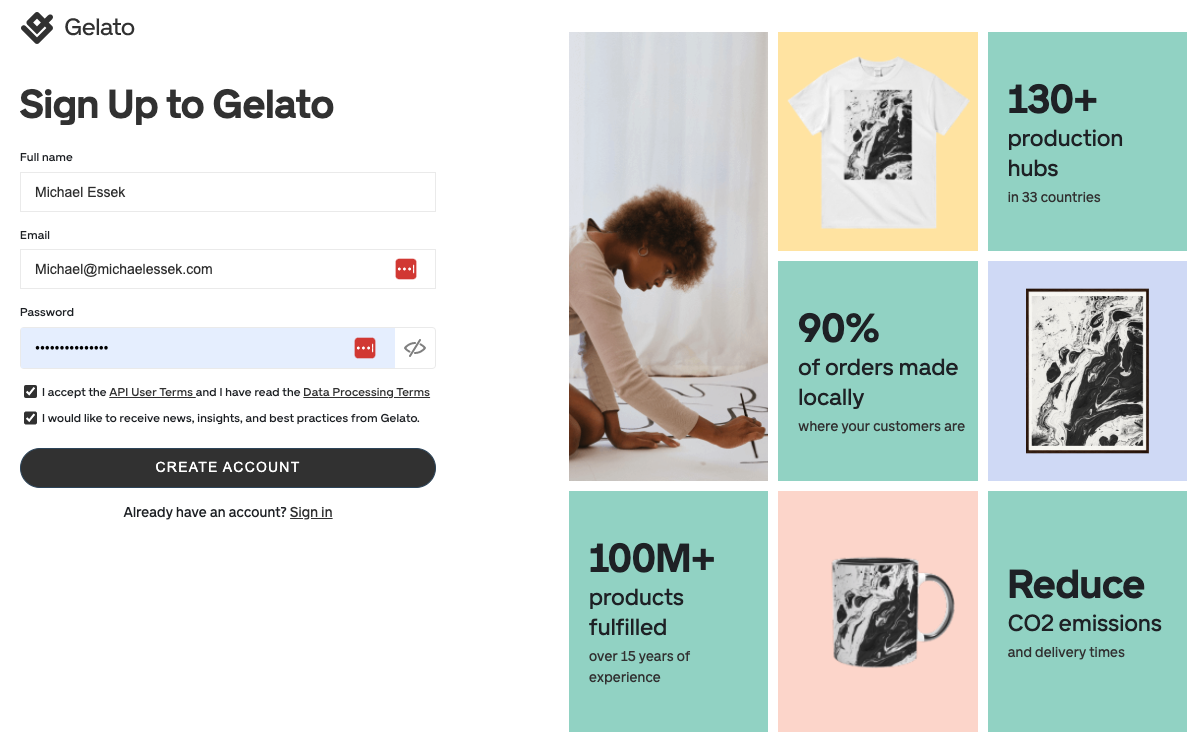
First, click the button below then click on the big ‘Sign Up For Free‘ button.
To create your new account enter your email and create a password.
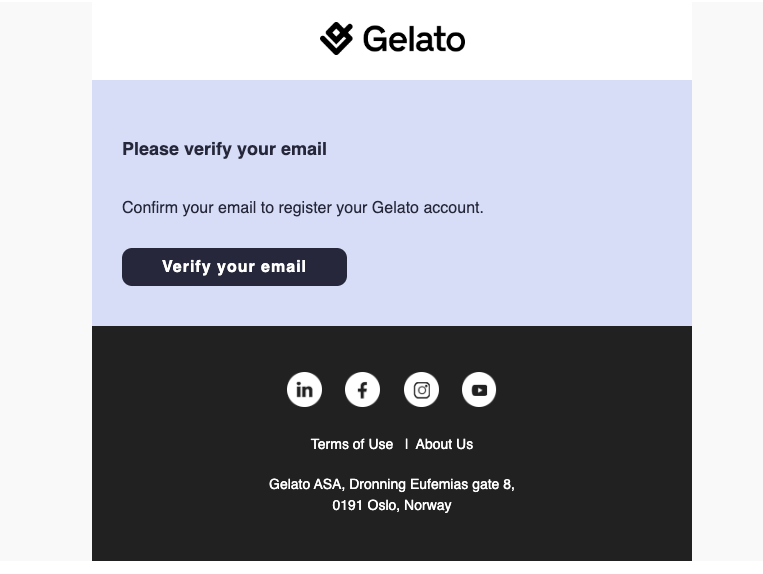
Gelato will send you an email asking you to verify your email address. Click Verify your email.
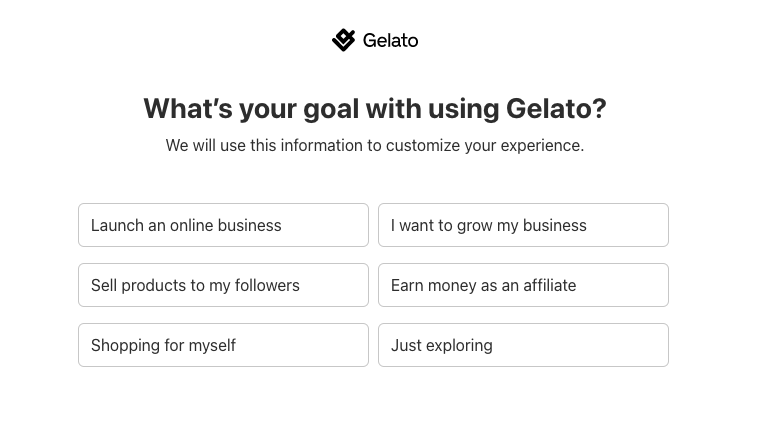
You will then be asked 4 simple questions about your business with a selection of answers to choose from: (answer these as best as you can, your exact response may not be an option – they only use this information to tailor your experience and recommend relevant products)
- What’s your goal with using Gelato? (Launch a business, sell products to followers, just exploring etc.)
- Which of these describes you best? (e-commerce seller, designer, influencer etc.)
- What products are you interested in? (clothing, wall art, drinkware etc)
- How did you hear about us? (google, social media, blog etc.)
And that’s it – your Gelato account is live! How easy was that?
Make sure you’ve saved your password somewhere!
2. Placing your first order
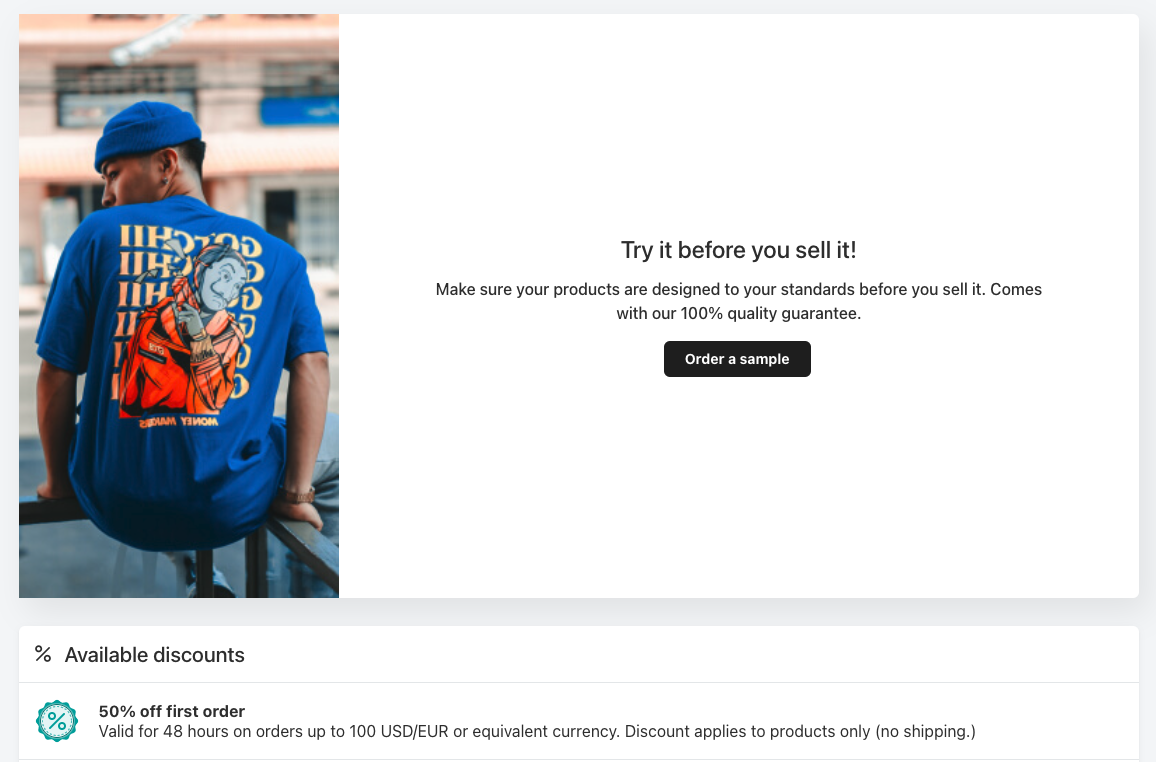
Click Order a Sample.
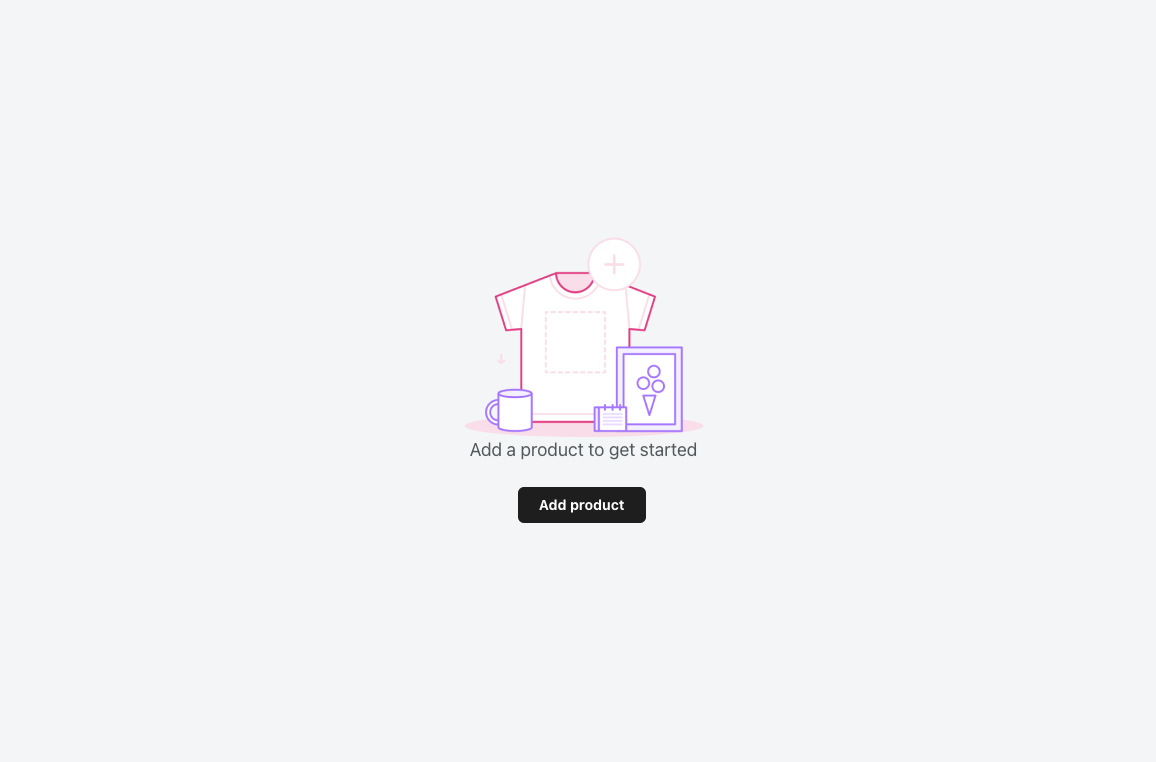
First off, you need to create the products you want to order. Click add product.
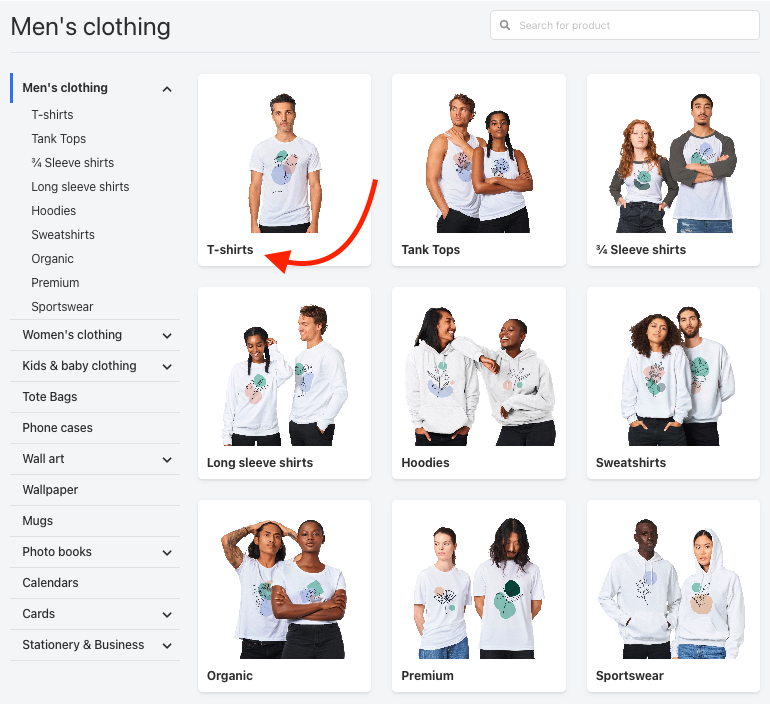
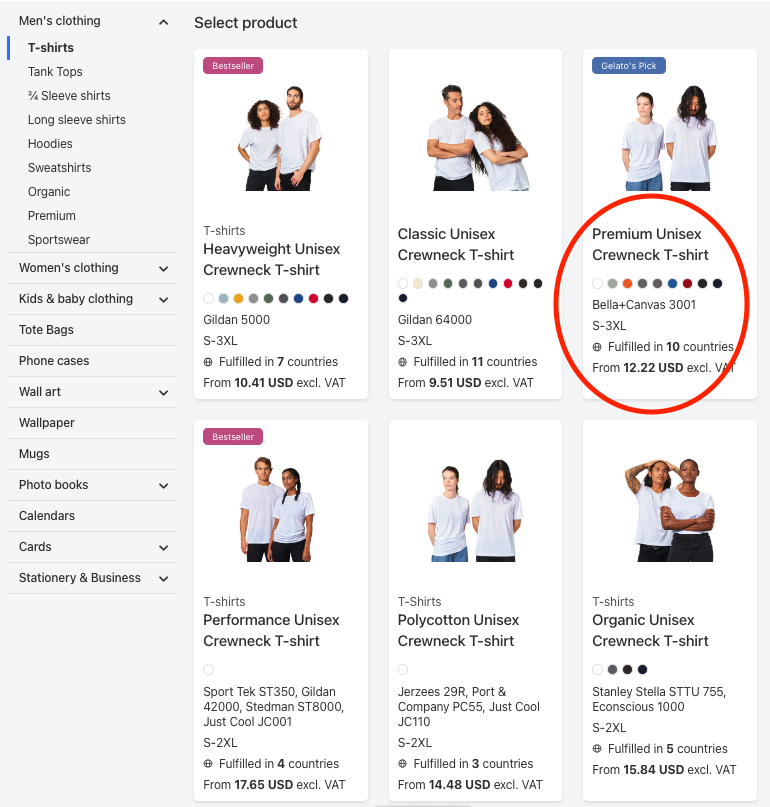
Now you choose the product you would like to print onto.
I’m going to click on ‘Men’s Clothing’ > ‘T-Shirts’ – but you can choose whichever product you’d prefer.
Choose the specific product you want to go with.
I’m choosing the Bella + Canvas 3001 – which is a soft, unisex, fashion fit T-Shirt and “Gleato’s pick”(Note: Choosing a bestselling garment like this should ensure there won’t be any delay in production and shipping – as Gelato are more likely to have plenty of stock).
This product page has a lot of useful real world information on that you might want to check before making your final decision. For example, you can click the drop down on “fabric” to find out how thick/thin or rough/soft the fabric is.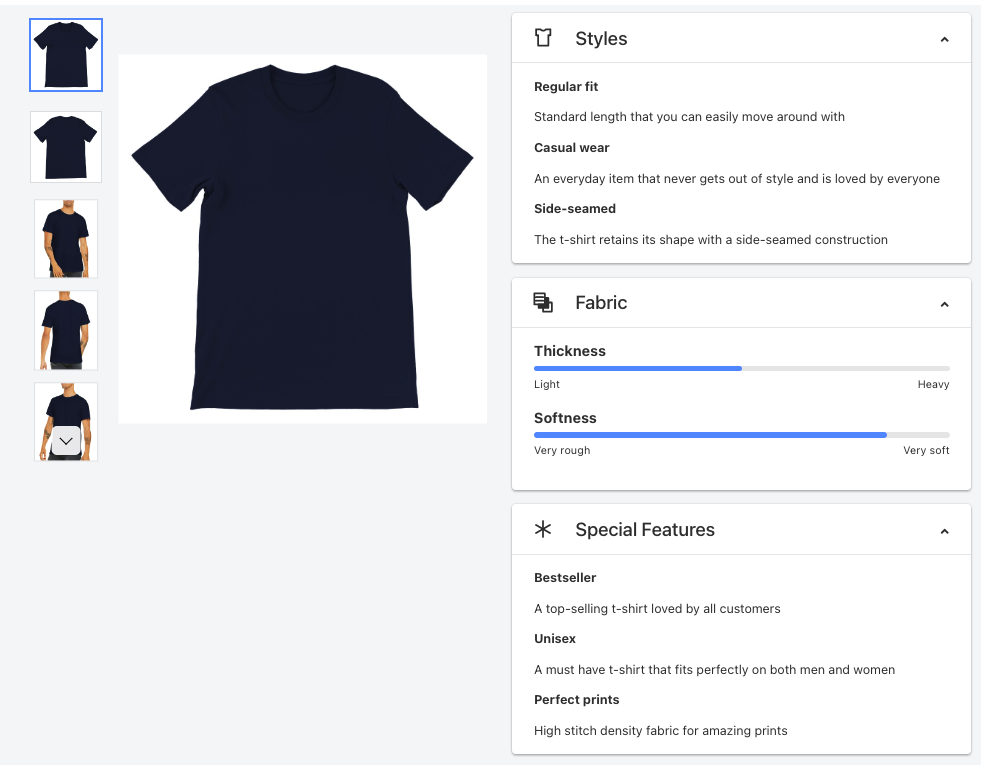
This product page also includes information on where the product is fulfilled, and if you can select the final destination country from the “deliver to” drop down, you can find out the shipping cost and estimated delivery time.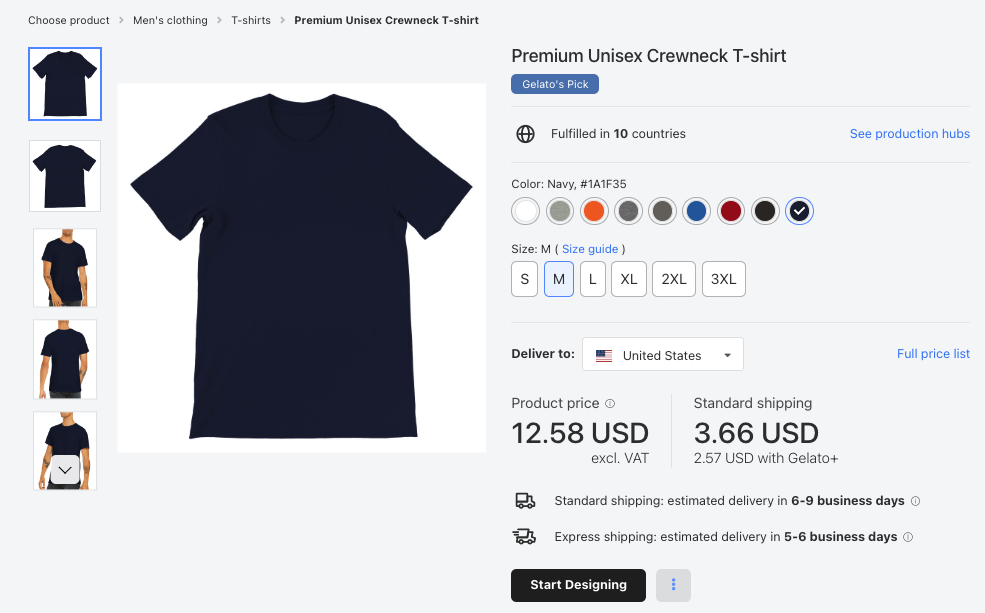
Once you are happy with your product choice click Start Designing and you will be sent to gelato’s product design page.
There is a lot to explore here, as gelato have loads of great features that will help you create a design. Including the ability to add basic text, select from pre-designed layout options or if you are a Gelato + member you can even select images and designs from Getty and Shutterstock and add them directly to your mock up here.
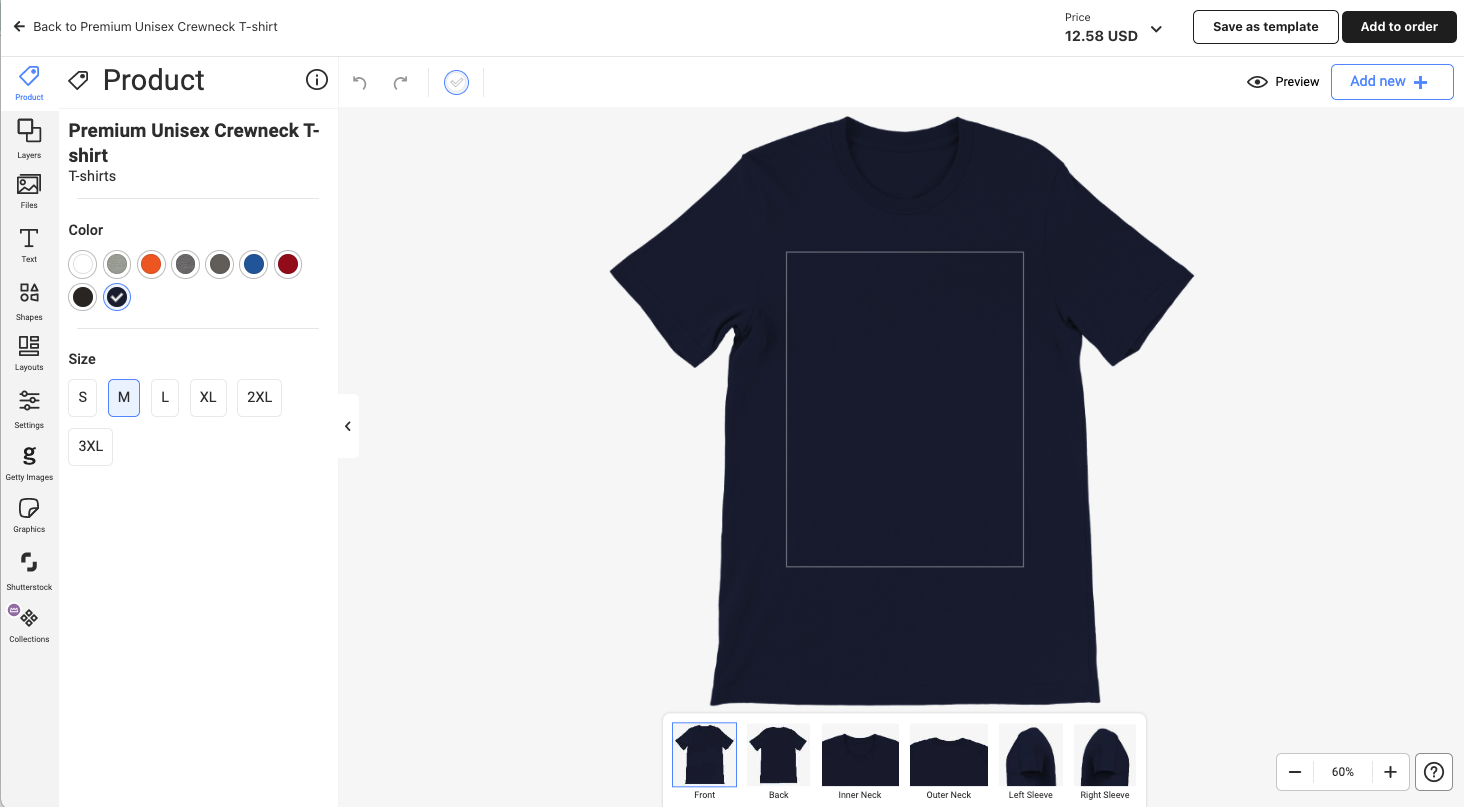
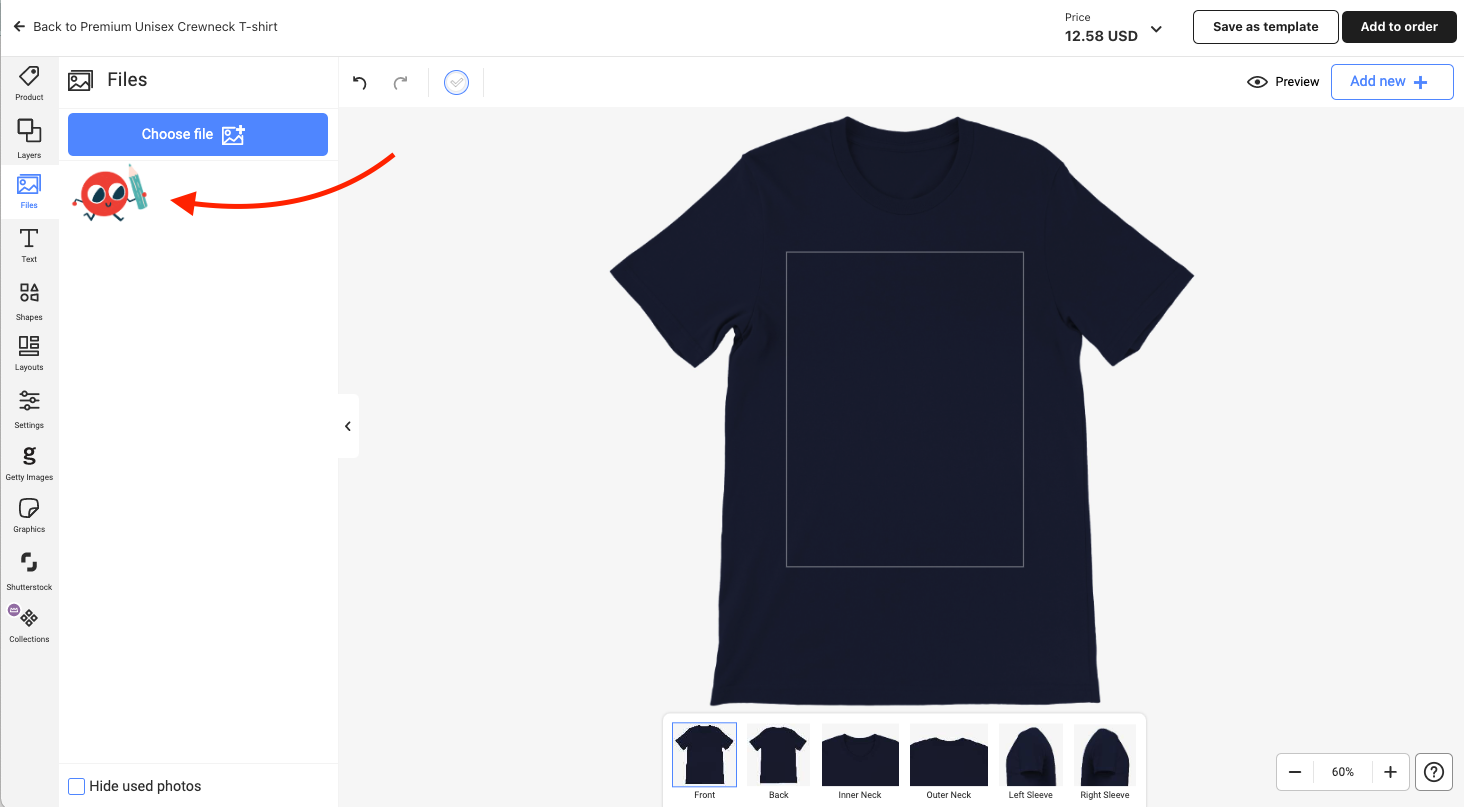
However, if like me you have a design you have already created that you want to add. Head to the side bar and click Files > Choose File
Gelato gives you a number of options for uploading a file. You can “browse files” or click “my device” to upload from your computer. Or you can upload directly from dropbox, google drive, google photos, shutterstock and even facebook or Instagram. If you want to upload directly from any of these you will be asked to authenticate and connect your accounts first. Then you can access all you files via Gelato.

Now search for the image you would like to print, double click it or click open. The image will be added to your “files” in the side bar menu.
Hover over the file and click the + button or double tap it to add it to your product.
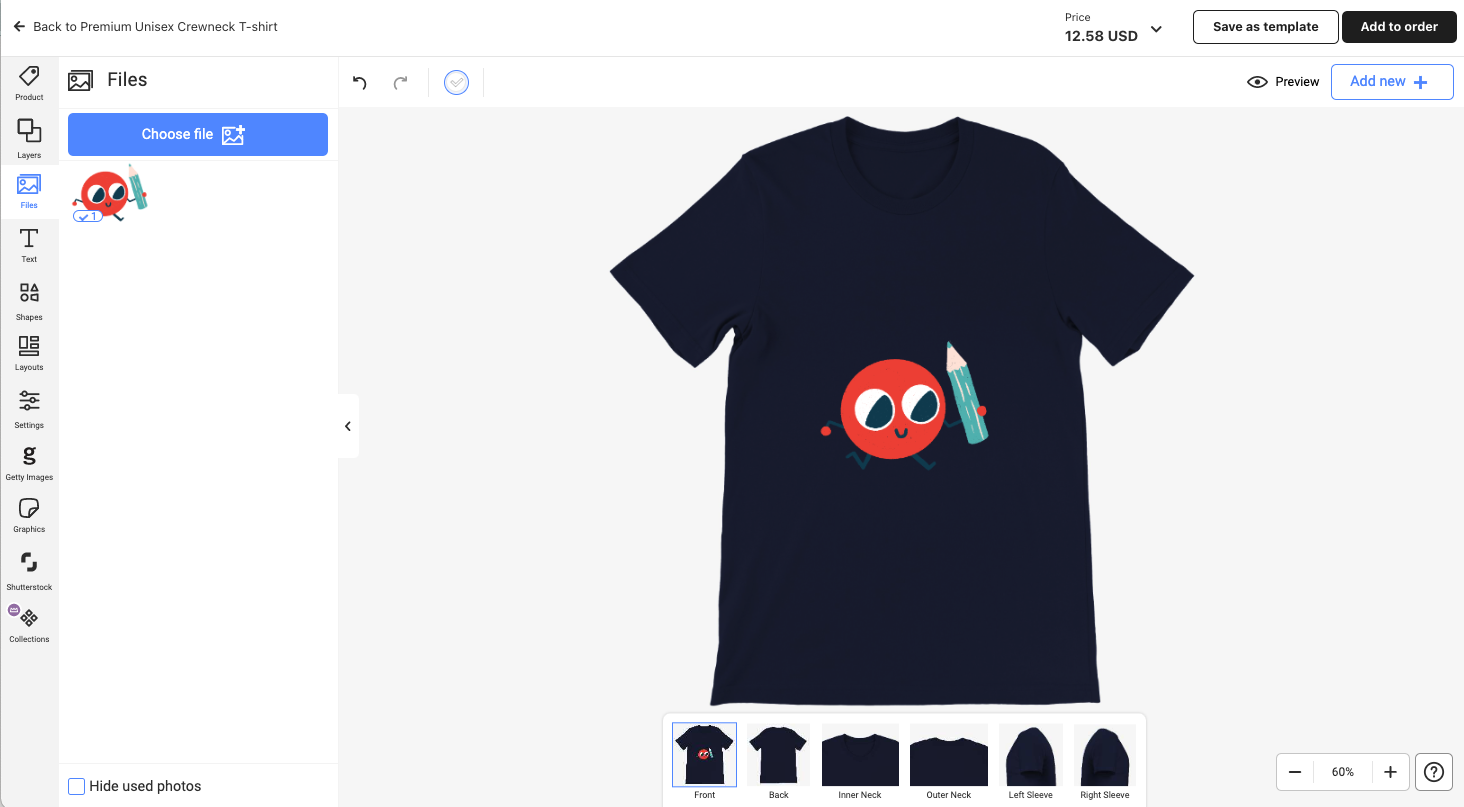
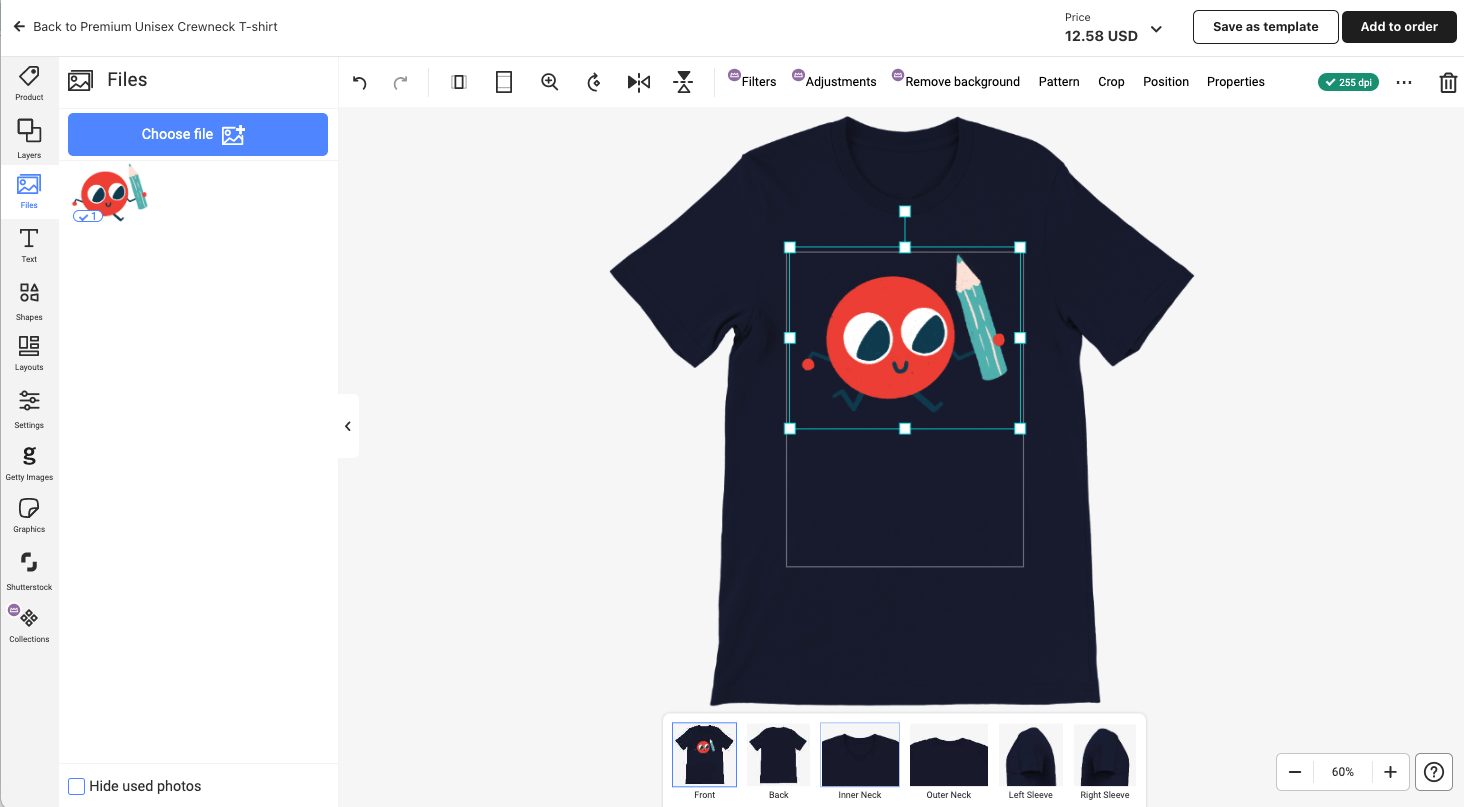
Check the positioning of the image and adjust it by clicking and dragging, or using the “position” and “properties” tools at the top-right of the page.
Select Product from the side bar menu and select the final colour and size you would like to order
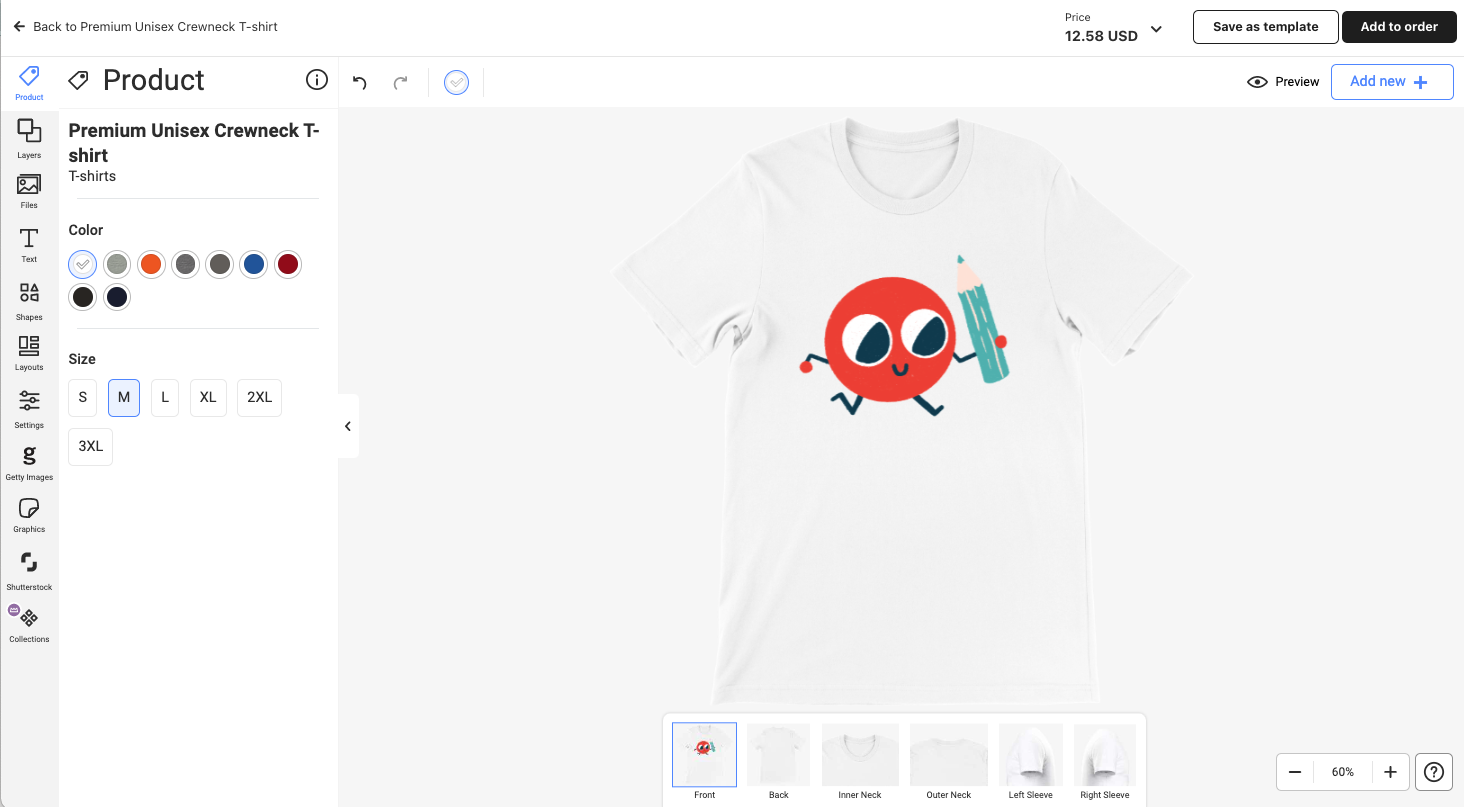
Click Preview to see how your garment will look on a mock up.
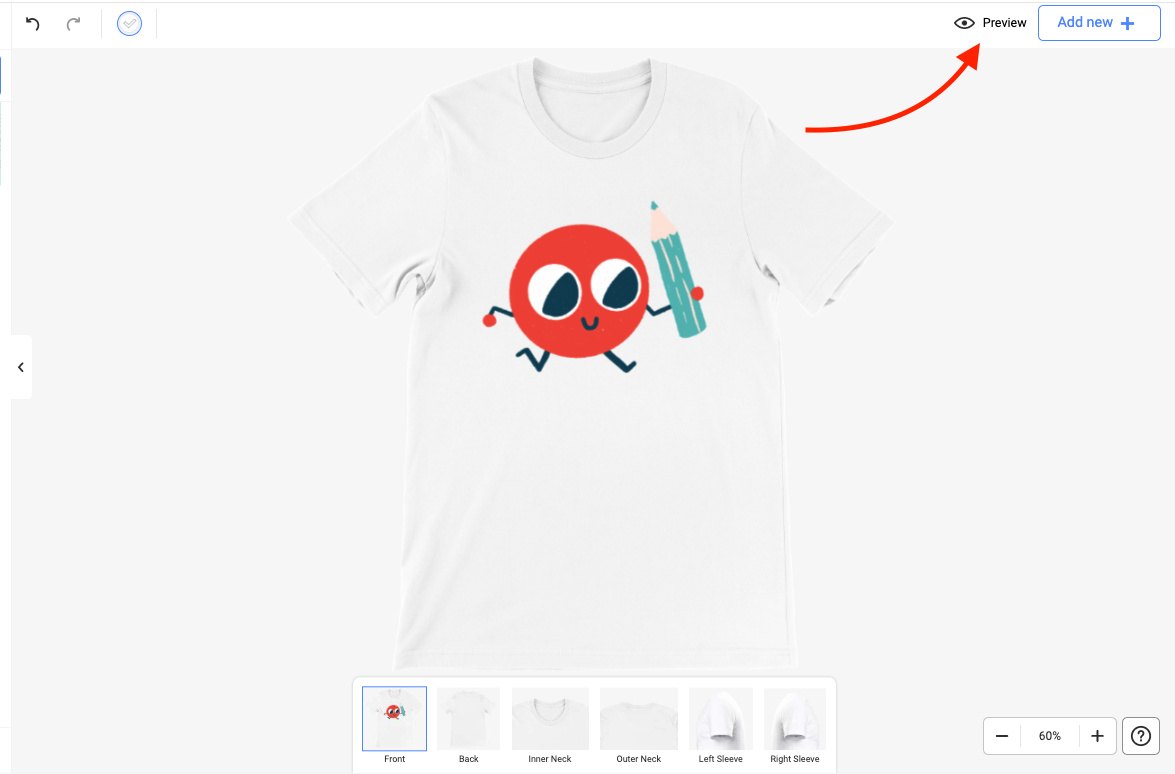
Once you are happy with your product click Add to Order

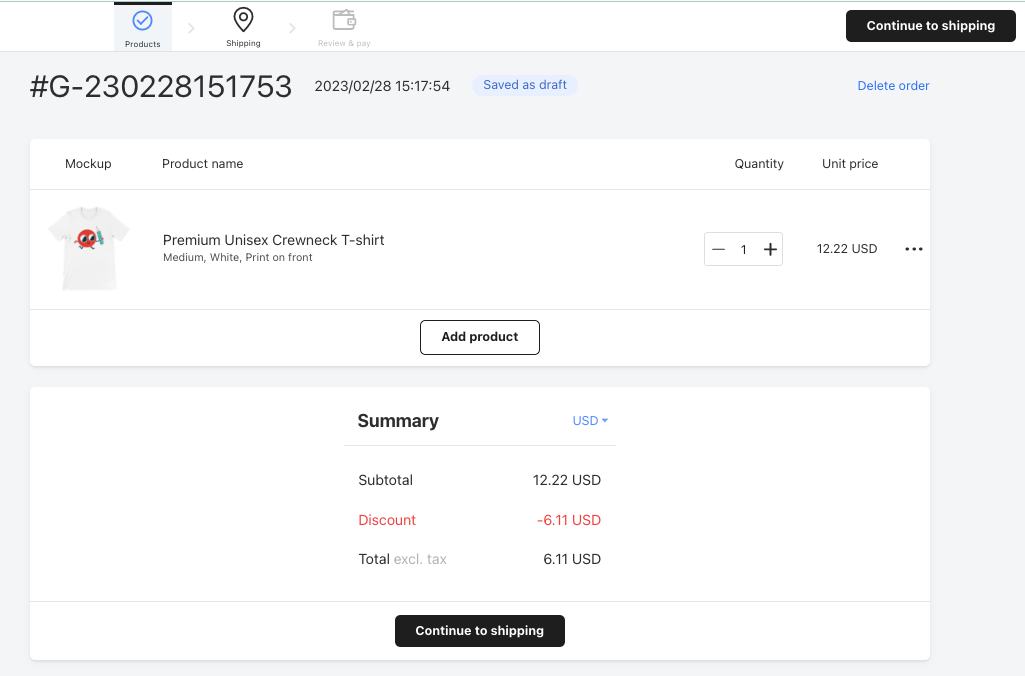
From here you can click add product if you want to add more products (and repeat the previous steps) or click continue to shipping.
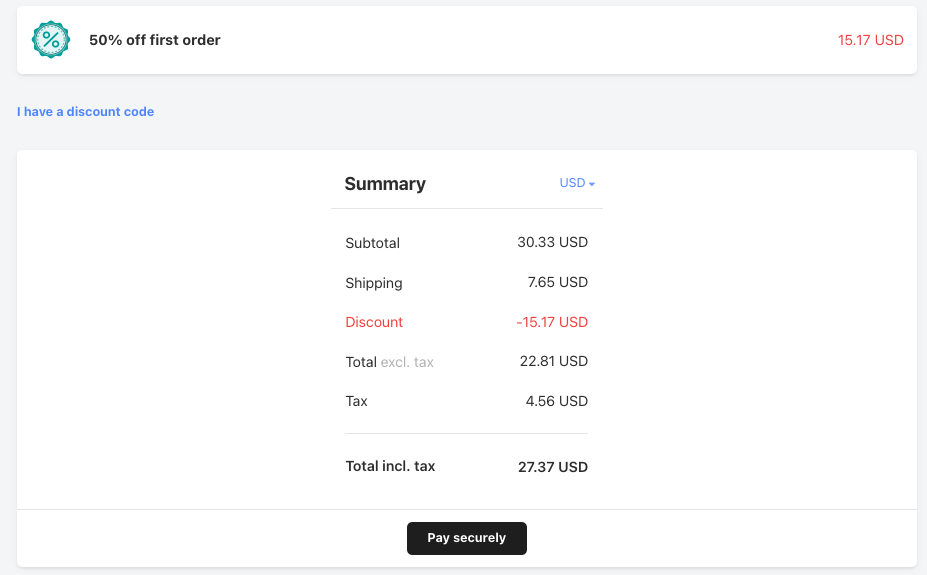
Don’t forget you get 50% off your first order (up to $100USD) if you order within 48hrs so check that your discount is included in the summary.
Update: Use Voucher code ESSEK at checkout to get an additional 10% off (ie. 60% instead of 50%) – on orders of £50 or more.
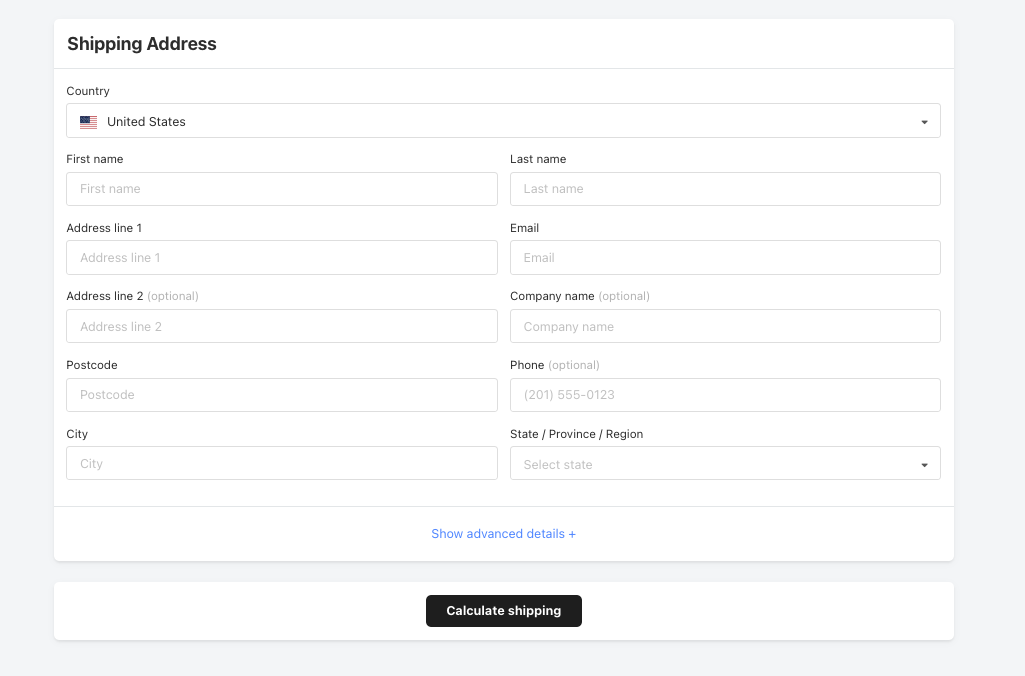
Enter your shipping address and click calculate shipping
Select your preferred shipping option and click continue to review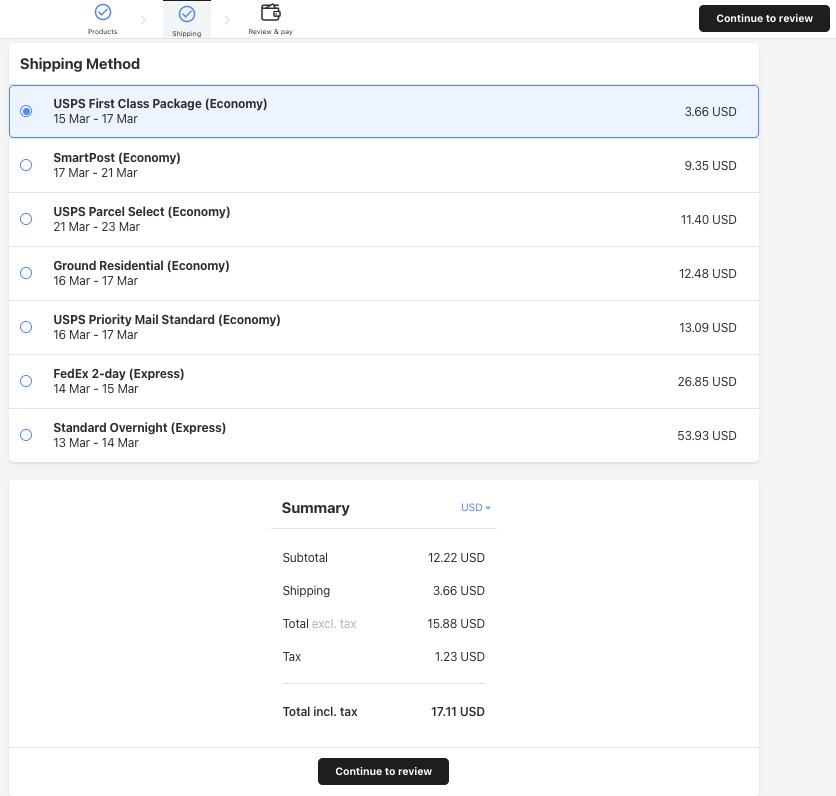
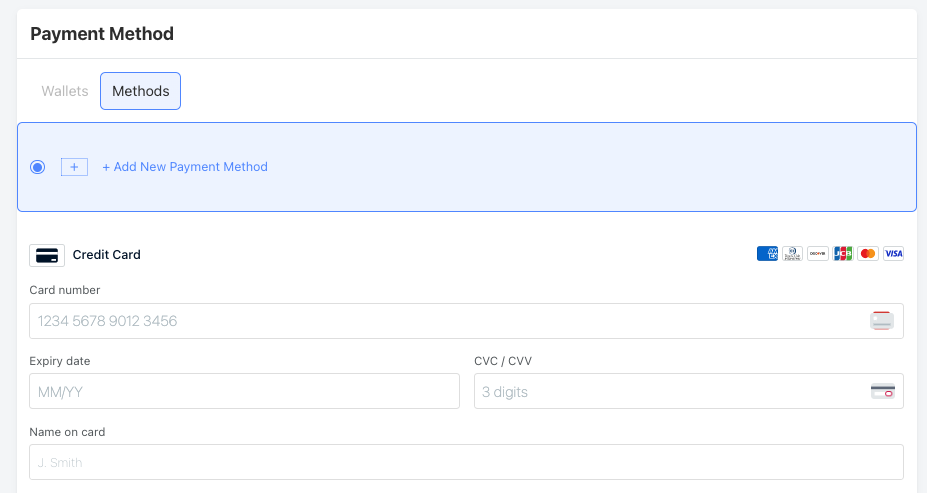
Enter card payment details, these will be stored to speed up future purchases – but this will only be charged for this single order.
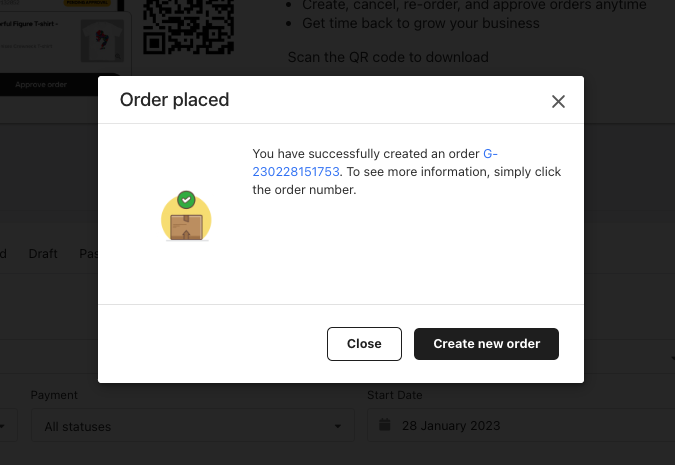
Check and confirm your order is all correct and click pay securely
Hurray! Congratulations you have completed your first Gleato order.
3. Reviewing Your Gelato Sample
A few days later, assuming everything went smoothly – you should receive a shipping confirmation email like this:
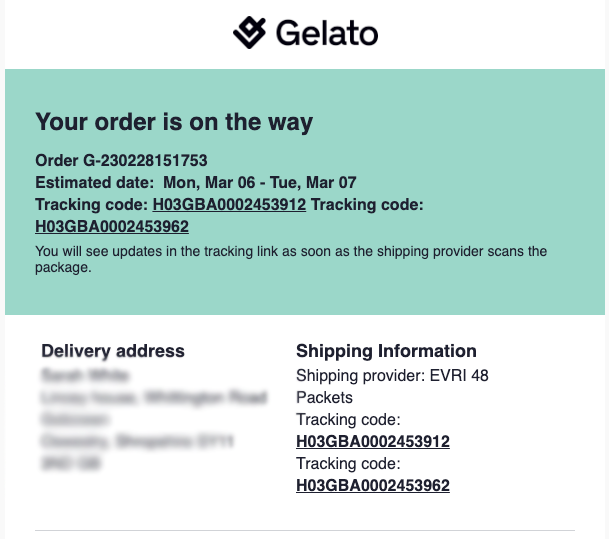
…that means Gelato have printed and shipped your order, and you can now track the shipping with the tracking number.
When it finally lands, here’s what you can expect the package and labels to look like:
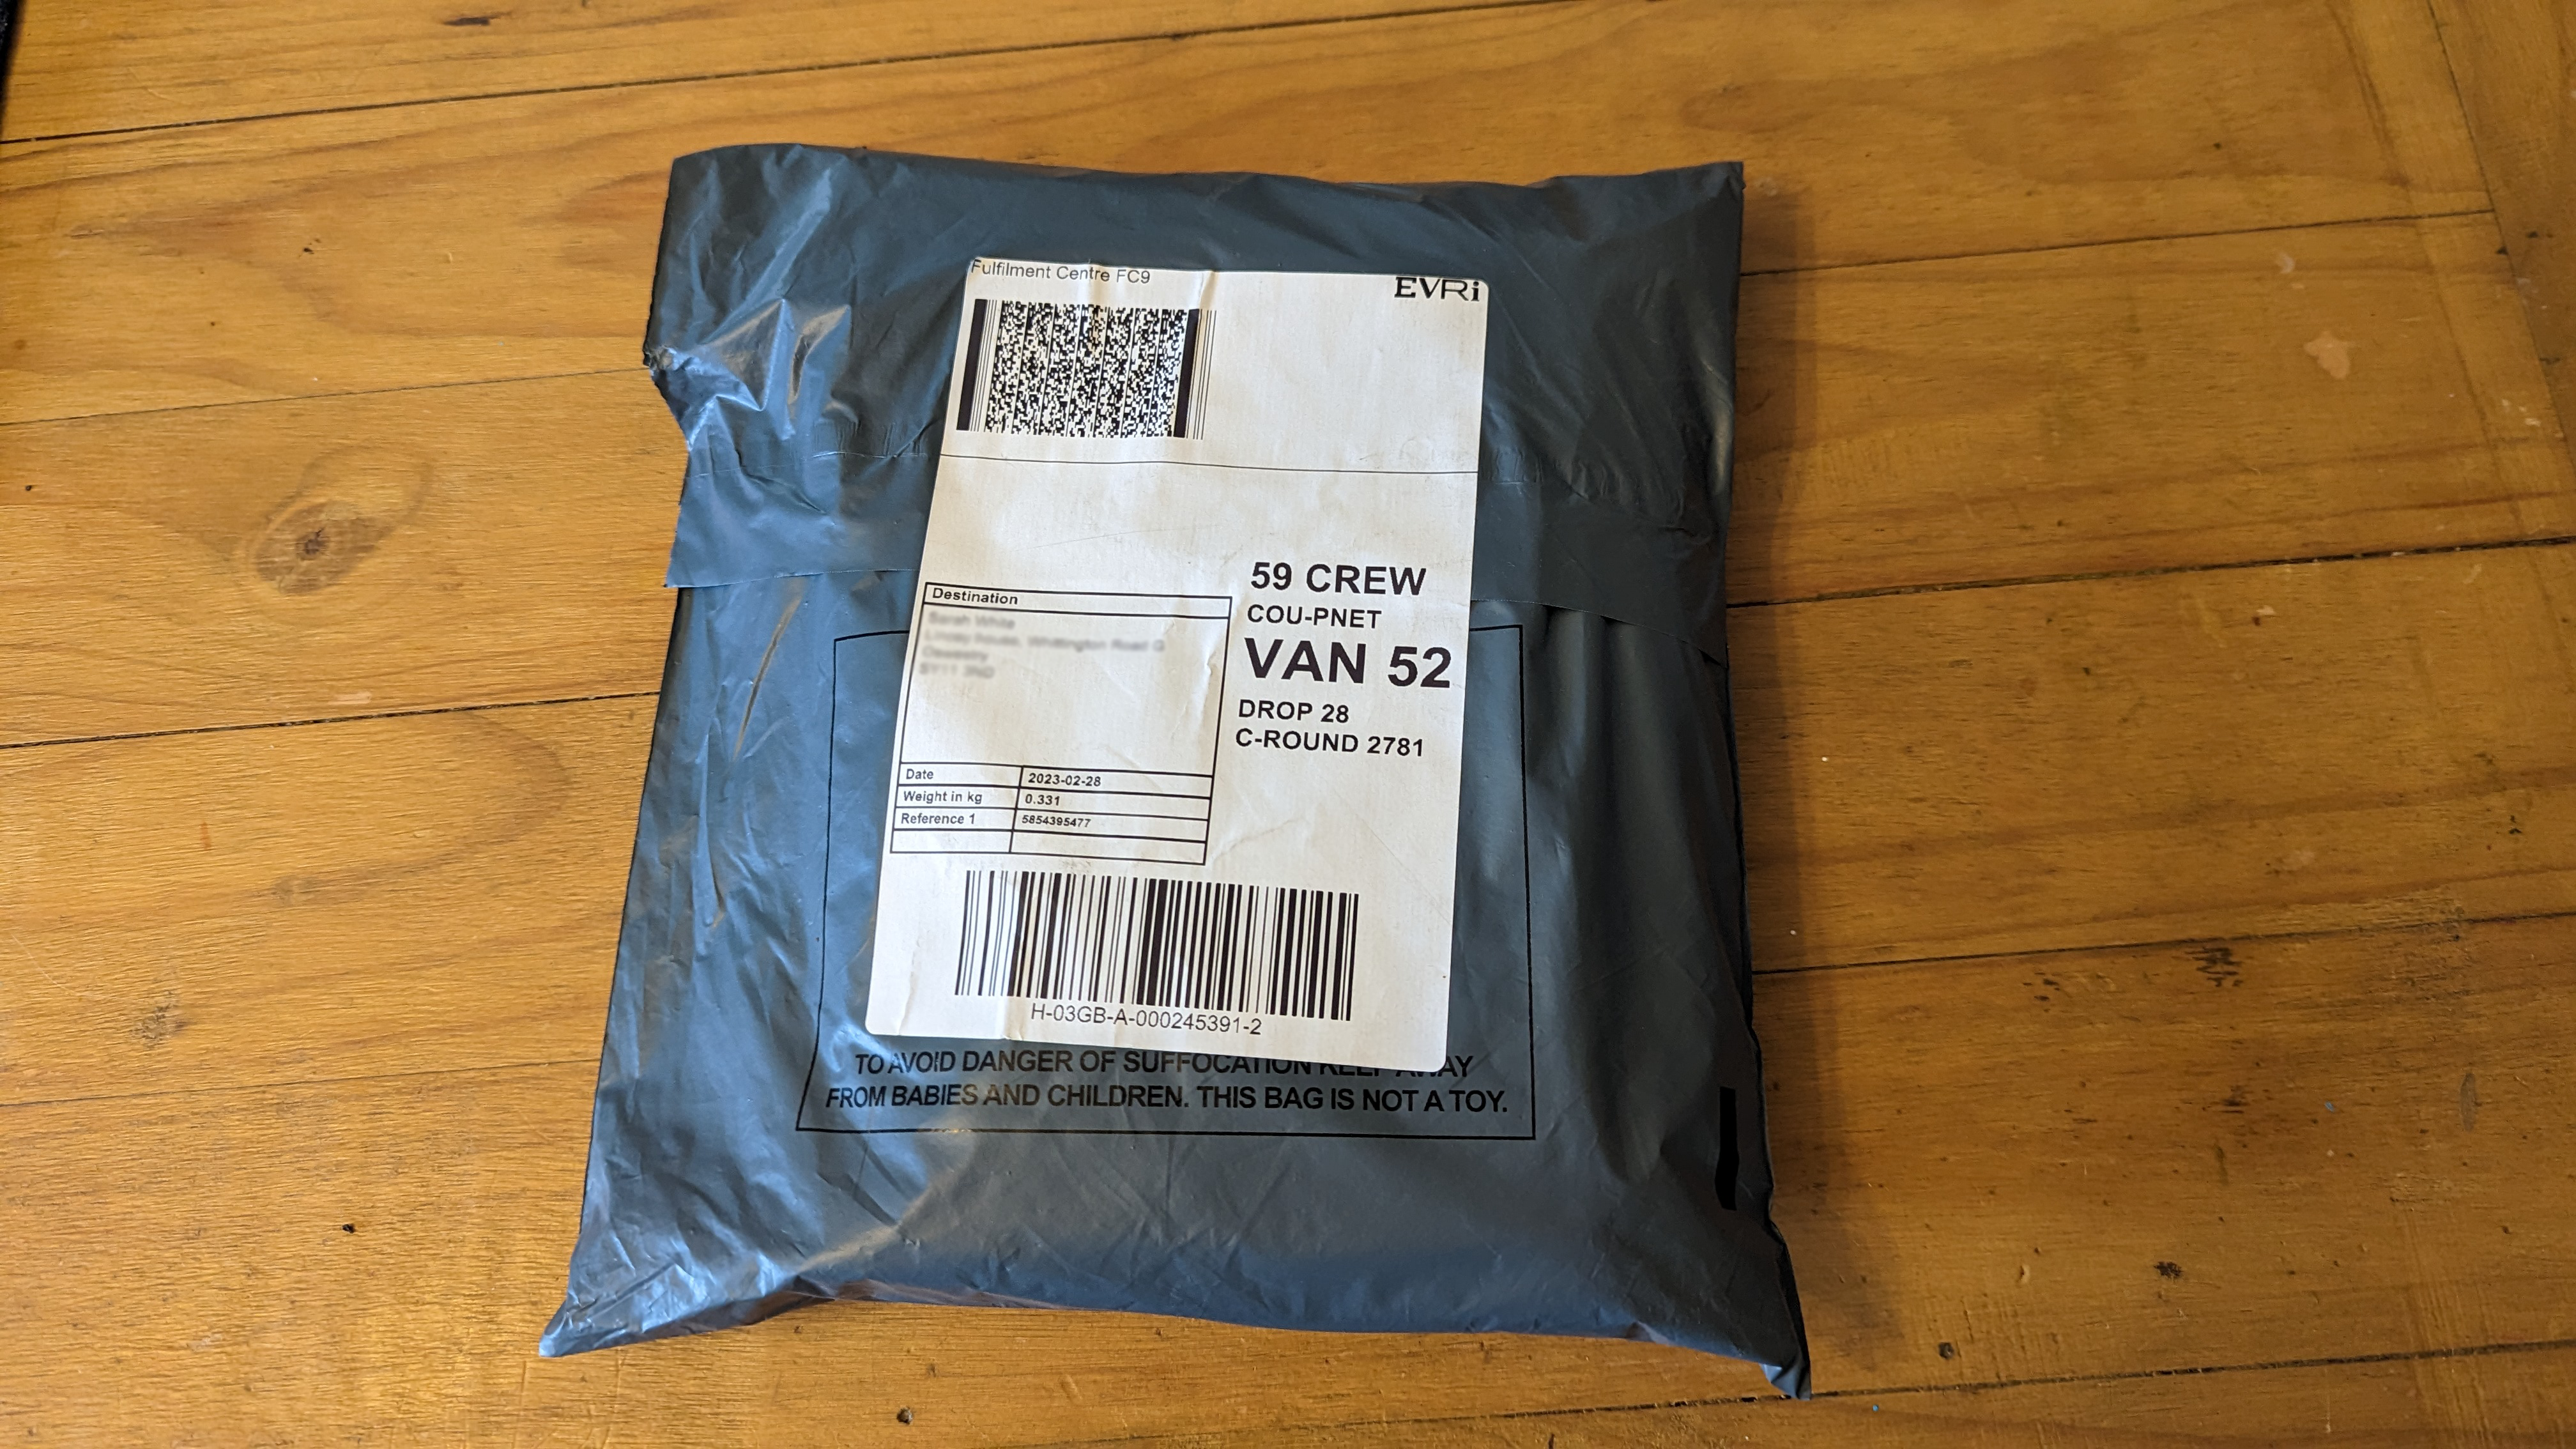
What’s inside;
- Our Gelato sample arrived with just the T-shirt and canvas bag, no packing slip or additional packaging (good news for the turtles!)
Gelato have recently launched the option to include a packing insert and/or branding label. So if you want branding on or in your package this is a great add-on option. They are only available on a few products and in 4 countries right now, but they are looking to expand this.
What To Look Out For…
When it comes to the product itself, here’s what to look out for:
- Any obvious errors, blemishes, or damages to the print or product. (If you spot any of these – contact Gelato about it).
- Does the product itself match your expectations? Is the garment soft, and does it fit as you’d expect?
- Print Quality. Are the colours how you would expect them? Is the image sharp enough? How does the print feel? (It’s normal for the print to feel a little ‘sticky’ at first – and this should decrease after a wash or two.)
Smells weird? Don’t be alarmed. Almost all DTG printers use a vinegar-like substance in the printing process, but the smell will disappear after a wash.
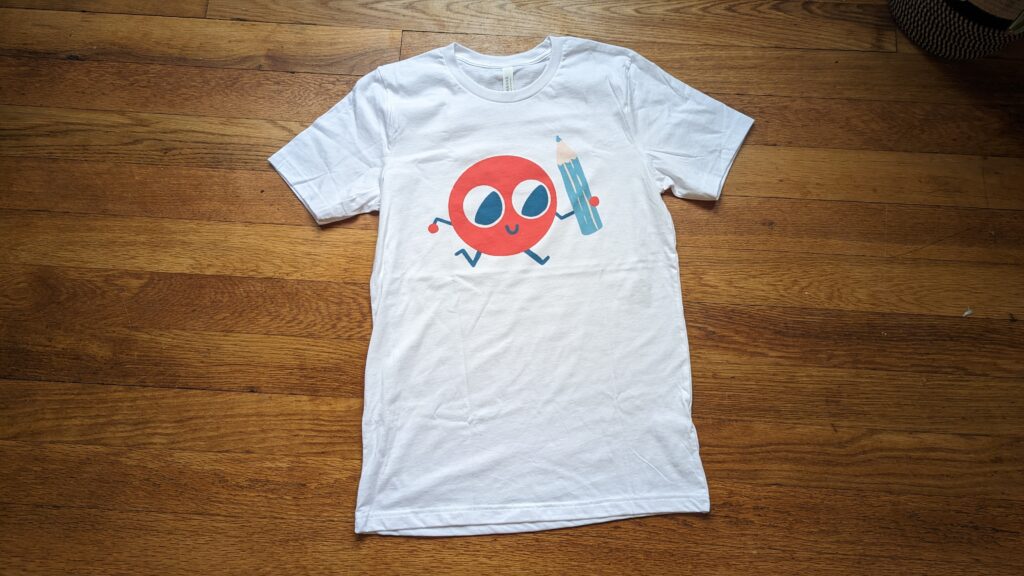
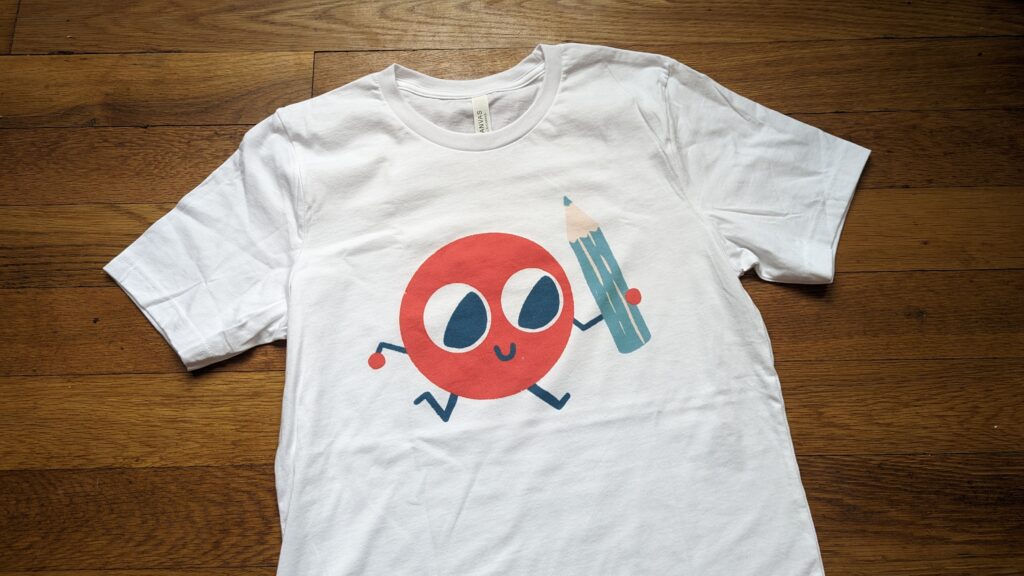
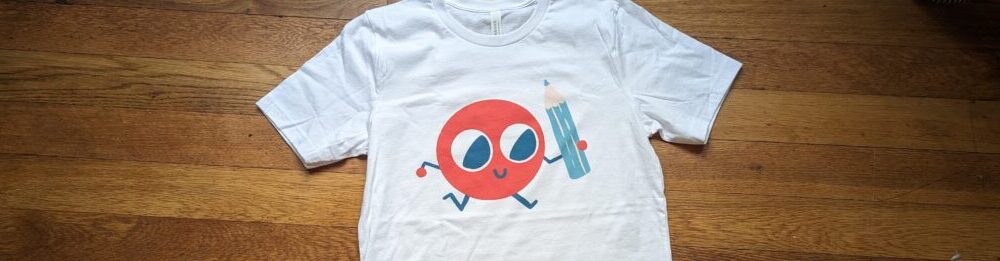
This particular print turned out nicely, and barely distinguishable from my similar Printful sample order.
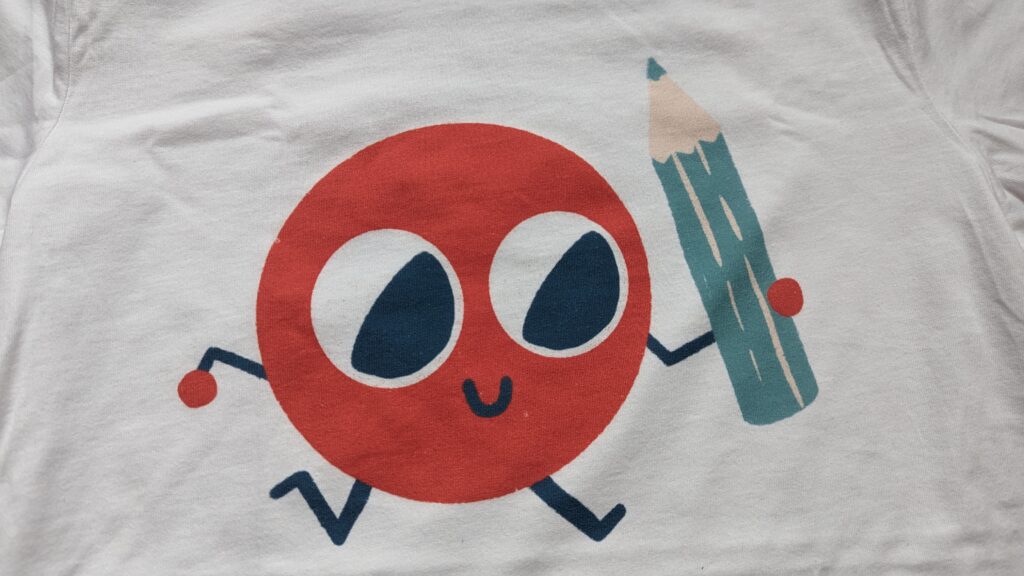
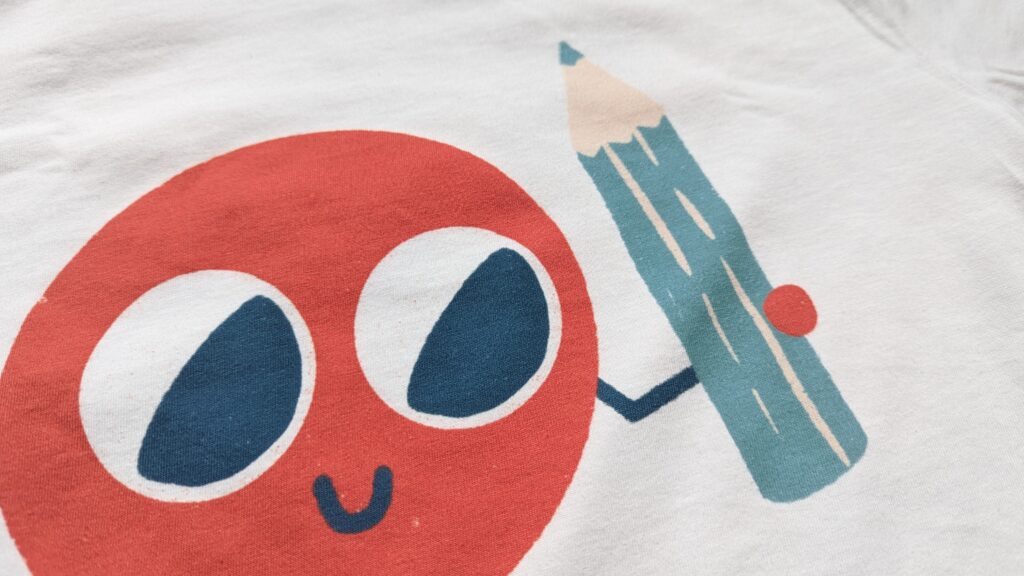
As my artwork wasn’t 100% sharp to start with (I used a kind of ‘blotted’ paintbrush effect for my logo) and the white dot near this little guys mouth is also part of the artwork (which I would remove after reviewing how it looks in real life on this sample)
So all in all I’m really pleased with how this print turned out.
When reviewing your product, the most important question you need to answer is this:
- Am I comfortable sending this product out to my customers?
If not, you will want to pinpoint why that is and fix it. (It could be an issue with your artwork, with the product itself, or with the printing quality).
If you think there has been a mistake made by the Print-Provider, reach out to Gelato for help. In my experience they are quick and eager to help.
And if you really aren’t satisfied with Gelato’s quality, you can test out an alternative provider like Printiful or Printify, or any other of the Print-on-demand T-Shirt fulfilment companies.
So there you have it – your first Gelato order done right.
Some final things to note:
- Gelato outsource’s printing to various production partners. So bear in mind that if you order a variety of products they could be printed and shipped from different locations – and will arrive separately, and within different time frames.
- Your 50% off your first sample order will only last for 48 hours after you have set up your account, so don’t wait around.
I hope this tutorial will help you place your first Gelato order, so you can feel confident selling your art to your customers, wherever they are.
To place your sample order, just click the button below to get started.
Notice a problem or mistake in this post – or something you think I should add? Please leave a comment below so I can keep it up to date!